![]()
This effect is really easy because you can do this manually without any special techniques. However, instead of one technique, I'll be showing you two techniques on the one page: a quick polar coordinates way and a manual way. When it comes to animating this it really is up to you because there are so many ways to do so. Electricity is kind of erratic so it can jump from one place to another in your sprite without you worrying about how fluid things look. If you are really good, you can create a nice electric ball animation with just one sprite and the use of PalFX, flipping, sizing and rotating, and an afterimage.
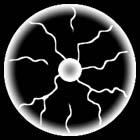
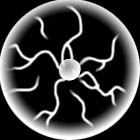
Oh, one more thing, when I say electric ball, I am referring to one that looks like one of those glass plasma balls you can buy from some stores.
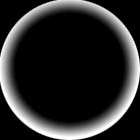
1) First off, I am not going to show you how to make an electric ball using polar coordinates (since I've covered the mechanics of the polar coordinates filter in previous tutorials) but I will show you the before and after shots so you can see how easy it is.


As you can see, it is just a couple of gradients and some manually drawn "bolts" that have been blurred. Looks more effective after the polar coordinates filter has been applied, doesn't it?
2) Now, we will cover the second way. For this, create a new 200 by 200 pixel canvas and fill the background with black. Then create a new layer (doesn't matter about the name).

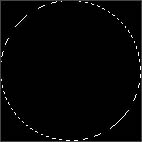
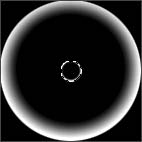
3) Use the circular selection tool and create a selection the full size of your canvas. Hold shift while you do this so that it keeps its shape as a perfect circle.
4) Now with the gradient tool, select a black and white gradient and make sure it is set to radial.
Create the gradient from the centre of the circle to the outside edge so it looks like below.
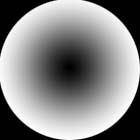
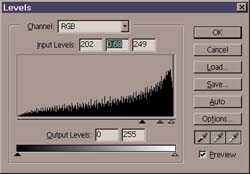
5) Because I want the edge to be thin, I adjusted the levels (Image > Adjust > Levels) so it was a bit darker in the centre. Alternatively, you could just fix the gradient from the start to reflect this look.
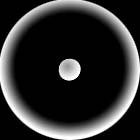
6) Deselect and copy the layer (rename it "core"). Press Ctrl + t to go into transform mode and shrink this ball to about 10% to 15% of it's size so that it becomes the "core" of the electric ball. However, I don't like the shading so we will change it.

Select the transparency for that layer by going into Layer > Load Selection then press 'OK' (If you don't make any changes when the "load selection" window comes up then it will automatically select the transparency for the layer you are currently on).
Once selected, just use the gradient tool to make a more "spherical" looking gradient. Deselect the selection (Ctrl + d). (I also lightened this layer a bit so the centre wasn't so dark)
7) Create a new layer over or under the "core" layer and begin drawing electric bolts with either the pencil of brush tools. If you are doing this with a brush, use a small hard-edged brush. There is no special technique to this. Just draw jagged-like lines.
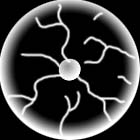
Once you are done, use the Gaussian blur filter or the smear tool to smooth the bolts out a bit. Now rename this layer to '1'.

8) Create another layer (rename it to '2') and do the same things but draw your bolts in the spaces of layer '1'. You can be more jagged and curvy this time if you want. Here, randomness is the key.
9) Continue doing this for a few layers until you get the number of frames you want. I've decided to do four.


10) Finally, for a little randomness, when you capture your final frames, you can make slight changes to the opacity to each frame to give that flickering effect.

| Now let's try our hands at a "Tornado" |
|